Planning a Photoshoot for your website: A Web-designers Guide
A well-planned brand photoshoot captures the essence of your health, wellness or beauty business, showcasing your expertise, professionalism, and personality. Whether you’re a yoga instructor, nutritionist, coach or skin therapist, your photos should visually tell your brand’s story and resonate with your ideal clients. In this article, we’re sharing the steps to take before your photoshoot day to ensure you end up with brand photos that are not only professional, but that help make sure your brand personality resonates across your website.

Plan Your Website Pages
While it might seem more enticing to jump straight over to Pinterest to begin your photoshoot planning. However, planning your website pages first will make your brand photoshoot much smoother and ensure you’ve got what you need when it comes time to build your website.
Knowing what pages your website will have helps you:
Determine how many photos you’ll need;
Ensure you get the right types of shots for each page;
Get the results from your photoshoot that fit with the purposes of your website.
Once you know what pages your website will include, plan to have 3-5 different images, varying in size, shape and content all relevant to the purpose and message of each page (you’ll find out more about planning the types of shots later in this article!).
Example: Your about page should feature images of you or your team, but it can also be a great place to utilise lifestyle and personal interest shots showing hobbies, pets, or family.
Example: Your services pages can showcase your work process with close-ups or staged interactions with a client.
Key Takeaway: Starting with a website plan can ensure you capture the right style and number of images for each page and section of your site. Book a website strategy session with our team →
Know Your Brand Colors
To create a cohesive website aesthetic, your photos should reflect your brand’s colour scheme. If you don’t already have a brand style guide, you’ll want this created before diving into the website build – regardless of whether you’re diy-ing it, or hiring a professional.
Once you have your brand colours, be sure to add them to your Brand Photoshoot Planning Guide. You’ll use these colours to coordinate outfits, props and even the location of your brand photoshoot.
Key Takeaway: A well-planned colour scheme makes your website look polished and professional and is a crucial step before having your website photoshoot.
Choose Your Location
Your photoshoot location should complement your brand and website aesthetic and picking the right location/s is one of the most important parts of planning your shoot – apart from choosing your photographer of course!
There are many options when it comes to locations for your photoshoot, these include:
Hiring a photoshoot space or venue
Sometimes a photoshoot calls for hiring a venue or studio space, to help represent the vibe of your brand. This can be great for work-from-home business owners, such as naturopaths, nutritionists and coaches, who might not feel their work space reflects their brand. Try searching sites such as Aloca, AirBnb, Pure Locations, or even Instagram to find a house, yoga studio, event space or photoshoot studio to rent that represents you and your brand. Always check with the venue to be sure you have permission before your shoot though – you don’t want to organise everything, only to have it all fall apart on the day.
Using your own space
When choosing your location, it’s important that your photos still authentically represent you. If you’re going to be seeing clients in person, capturing images in your workspace adds authenticity. If you’re a beauty therapist or skin clinician, pilates, yoga or fitness instructor who works out of a dedicated space, this is an absolute must! Having photos taken in your space helps potential clients understand what the experience will be like and ensures your website photos authentically represent you.
Outside locations
Beaches, parks and natural settings are perfect locations to shoot your brand photos. Just be sure that your chosen location reflects your brand’s vibe, brand colours and makes sense.
Consider the natural colours in your location’s surroundings, ensuring they will enhance, not clash with, your brand colours throughout the website. Golden-hour beachside images are perfect for peachy-pink sunsets, while a park can be the perfect option if your brand has more natural, earthy or green tones.
Lighting is everything. When shooting outside, you are at the mercy of the elements; this is not only the light itself but also wind, temperature, and unpredictable weather conditions. Overcast days can provide soft, even lighting, while bright midday sun can create harsh shadows. If possible, plan your shoot for early morning or late afternoon (golden hour) when the light is softer and more flattering.
Also, consider how busy your chosen location is. Beaches and parks can be crowded, making getting clean, distraction-free shots harder. If privacy is important, scout your location ahead of time or choose a quieter day and time for your shoot.
Lastly, think about logistics. Are there nearby restrooms or places to change outfits? Being prepared ensures a smooth and stress-free shoot.
Key Takeaway: Your location should enhance your brand and provide a visually appealing setting. Think about the colours, textures, and overall aesthetic of your chosen location. Discuss options with your photographer to determine the best time of day and any practical considerations to ensure your shoot runs smoothly.

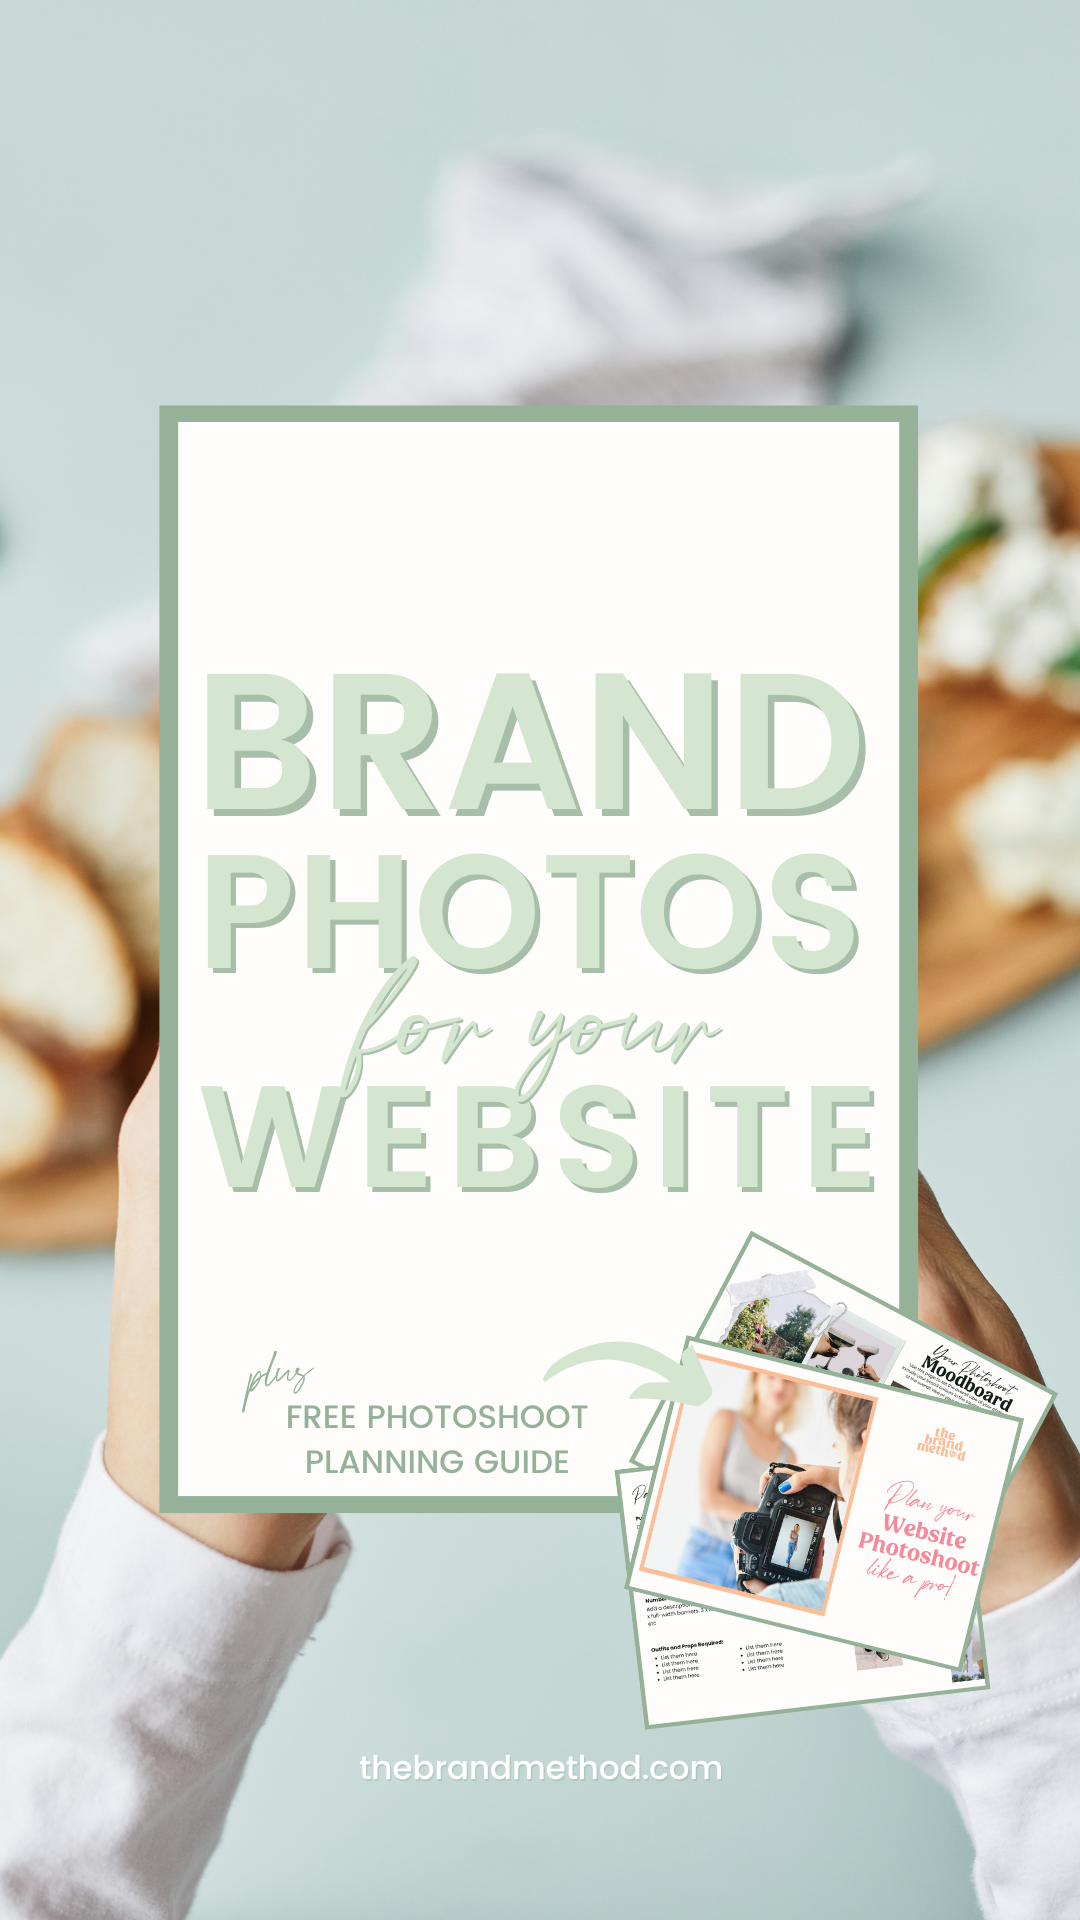
Download our free brand photoshoot planner
Plan and execute your brand photoshoot like a pro.
Whether you DIY your photos, or hire a professional, you’ll want to get your hands on this.
Plan Outfits, Props & People
Now for the fun part—choosing outfits, props, and who will be in your shots – all contributing to a cohesive and visually appealing website.
Outfit Coordination
Your outfit choices should align with your brand colours and vibe. For example:
A yoga instructor with a calming, earthy brand may opt for soft, neutral-toned activewear.
A personal trainer with an energetic, high-performance brand might wear bold colours like red, black or yellow to evoke strength and motivation.
A naturopath with a holistic approach may choose relaxed, natural fabrics in muted greens and browns to reflect a connection with nature.
Sticking to a consistent colour palette, that aligns with your brand colours of course, and clothing style that matches your brand’s vibe, ensures your website looks polished and professional.
Props That Enhance Your Brand Story
Props can add depth to your images and reinforce your brand message. Consider items that reflect your services and expertise:
A massage therapist could include essential oils, a massage table, or calming candles.
A nutritionist might showcase fresh produce, cookbooks, or a laptop to represent virtual consultations.
A beauty therapist may include the products they use, a clipboard containing forms or notes, close-ups of their equipment or a client checking-in.
Each prop should be intentional and add to the story you want to tell about your brand.
Who’s in the Shots?
Think about whether your shoot will include clients, team members, or just you. For example:
A pilates instructor might include a small group of students to showcase a class environment.
A chiropractor may pose with a client to demonstrate an adjustment.
A holistic health coach could feature a client in a mock consultation, emphasising a welcoming and supportive setting.
Planning who will be in each shot ensures you capture the right moments that represent your business authentically.
Key Takeaway: Thoughtfully chosen outfits, props, and people help create engaging, on-brand visuals. It’s a good idea to plan out what outfits each person will wear, and what props are required for each group of shots, to keep your photoshoot day running on time. Our free photoshoot planning guide can help you with that.
Gather Inspiration
Now that you've planned your outfits, props, and participants, the next step is ensuring your vision comes to life through thoughtful inspiration gathering. To bring your vision to life, collect inspiration from:
Websites of businesses in your niche
Photography portfolios or Instagram accounts
Mood boards on Pinterest or Canva
We suggest browsing at least five different websites of successful wellness or beauty businesses in your niche and take notes on the photography styles that stand out to you. Look through photography portfolios or Instagram accounts of brand photographers specialising in the wellness industry. Pay attention to:
Poses and expressions that feel natural and inviting;
Lighting styles that create a warm and professional look;
Composition and background choices that align with your brand identity.
For example, if you're a meditation coach, you might be drawn to soft, serene images with warm natural light. If you’re a gym owner, dynamic action shots with strong contrasts and movement may be more fitting.Or a beautician may opt for crisp white backgrounds and a clean aesthetic.
Use Mood Boards to Convey the Desired Style and Atmosphere
Creating a mood board can help you organise your ideas and ensure your photographer understands your vision. Use tools like Pinterest, Canva, or a simple Google Doc to compile images that reflect:
Your ideal colour scheme and tone.
The types of locations you want (e.g., outdoor greenery for a wellness retreat, a bright studio for a pilates instructor).
The emotions you want to evoke (e.g., empowerment, relaxation, motivation).
By sharing your mood board with your photographer, you provide clear direction and set the stage for a successful shoot that captures your brand’s essence.
Key Takeaway: A clear vision and inspiration board can practically share your vision and help your photographer capture your desired look and feel.
Create a Shot List (Types of Shots)
Many business owners invest in a photoshoot only to find they don’t have the right images when it comes time to create their website – not because they’re not great photos, but because they’re not the right fit for specific places on the site. You can avoid this by planning the types of shots you’re going to need, we’ve outlined the main ones below.
Wide-Angle Shots with White Space
Essential for banner images with text overlays. You might be standing to the side of the image, against a concrete or plain coloured wall, or perhaps an image of you sitting by the ocean looking out at a large expanse of beach. Knowing how many pages your website will have allows you to plan how many different wide angle header images you might need to ensure you’ve got variety across your site.
Standard Wide-Angle Shots
Great for section dividers or call-to-action areas. These types of shots may have more detail in them than the abovementioned. For example, you might have an image of your pilates studio filled with students mid-practice, or an image of what the inside of your clinic/therapy space looks like, or a beautiful image of natural scenery such as an ocean or forest that matches your brand aesthetic.
Headshots
Images where the focal point is on you, usually from the waist upwards – but that doesn’t mean it has to be boring and corporate looking. Consider what environment your clients would most likely correlate with your services, and weave both spatial prompts and props into your imagery. For example, as a nutritionist, you could be leaning on a kitchen bench with some of your favourite foods on it. As a fitness coach, you could be holding weights or boxing gloves, striking a pose. Keep it fun, keep it interesting, and keep it on-brand.
Action Shots
Show yourself at work—coaching, teaching, consulting or treating. If you see clients in-person, utilise a willing friend or client to perform exercises or receive treatment from you. You can also include shots of you walking, running, jumping, or celebrating to bring even more personality to your brand and website photos.
Close-ups and Props
Hands on a keyboard, a product in use, or workspace details relevant to what you do. A naturopath might get a close-up shot measuring out herbs, and an image of their herb bottles on the shelf. An acupuncturist might get a close-up shot of the application of acupuncture needles, and a prop shot of acupuncture cups sitting in a nice corner of the therapy room.
Key Takeaway: A well-planned shot list ensures you get all the images needed for a professional and engaging website.
Practice Some Poses
If you feel you’ll be awkward posing in front of the camera, with nowhere to hide, try practising some poses to find what feels natural and comfortable. Decide which poses will align best with your mood and message (e.g., are they playful, serious or celebratory kind of poses). Your photographer will also likely guide you as to what looks good, repositioning you on the day.
Need ideas for some poses to practice? Check out our Pinterest Board full of brand photoshoot inspiration.
Receiving Your Photos from Your Photographer
You’ve done all the hard work of preparing and planning for your photoshoot. You’ve had your hair and makeup done, and the photoshoot went beautifully. With champagne in hand, and your feet up (or soaking in a footbath!) all that’s left to do is sit back and wait for your photographer to deliver evidence of your magic presence in the form of digital proofs.
Before your photoshoot, be sure to chat with your photographer about what types of editing they do, so that you know what to expect. Ensure that you understand their turnaround times, for receiving the edited photos back to ensure that this aligns with when you’ve booked in your web design project, or plan to launch your site.
Remember, effective communication with your photographer is key throughout the entire planning process. Be open to their suggestions and input, and find someone you can easily share your vision and expectations with.
Your brand photos are an essential tool for marketing your business. By carefully planning your outfits, props, and participants, as well as gathering strong visual inspiration, you’ll ensure that your photoshoot produces stunning, professional images that align with your brand’s identity. With the right preparation, you’ll walk away with a collection of images that truly represent your busin
Final Checklist:
Identify key website pages and their photo needs
Confirm brand colours and coordinate outfits accordingly
Choose a location that aligns with your brand aesthetic
Select props that enhance your story
Plan who will be in each shot (clients, team members, or just you)
Create a shot list covering banners, action shots, headshots, and close-ups
Gather inspiration and share a mood board with your photographer
Double-check lighting conditions for your chosen location